When you’re pushing hard on the pedals to get that last little bit of speed, about 3 feet before the finish line, and then — THWAM! — something goes wrong.
With a loud clang, the chain FALLS off the rear wheel, costing you precious seconds as you dash to the finish line.
Why is the bike chain slipping when pedaling hard?
In this post we will be discussing the various causes of this issue and how to fix it so that it will never happen again!
Why Is My Bike Chain Slipping When Pedaling Hard?
Many things can cause your chain to slip when you’re cycling hard. If you’re not sure what’s wrong, you should have a professional mechanic have a look at your bike.
Also read: Bike Chain Won’t Go Backwards? Here’s Why
Listed below are some more possible explanations for your bicycle chain slipping on the pedals:
1. Bent derailleur
In the majority of cases, a bent derailleur is at blame. By removing the derailleur from your bike and twisting it sideways, you may determine if it is bent. If it appears to be straight, you should buy a new one.
2. Faulty Sprocket
If your bike’s sprocket is old or damaged, your chain will slip because the sprocket no longer has enough teeth to effectively grip the chain links.
3. Problems With Gear Indexing
In many cases, a slipping chain can be traced down to a simple drivetrain adjustment. These issues are so widespread that you’ll find them on even the newest of bikes.
4. Large Chain
The next reason why your bike chain is slipping is because of its size.
If your chain is too big for your current gear setup, then you’ll have problems with pedaling resistance caused by friction between the chain and sprockets.
5. Small Chain
If you’re looking for a chainring with a diameter of 110 to 130 mm, you’ll have plenty of options.
Larger chainrings will be needed for smaller gears and vice versa.
The chain will not be able to gain enough grip on the drive sprocket if the chainrings are too tiny for the gear you’re using.
6. Worn Out Crankshaft’s Needle Bearings
Your crankshaft needs to be oiled regularly so that the needle bearings don’t get damaged by water or dirt, which can cause them to wear out faster than they should and eventually break down completely.
7. Tightened Cables
Because cables stretch over time, it’s akin to a slipping chain from improper indexing, but it might also induce identical symptoms on a fully indexed drivetrain.
Cable-related mechanical faults can happen to any bike, regardless of brand.
8. Broken Chains
If your chain is slipping on an older or heavily used bike, this is likely one of the first items that should be checked.
To keep your drivetrain in top functioning order, you need to replace your chains regularly.
9. Insufficient Lubricant
While lubrication is critical to the operation of your bike’s mechanical components, the absence of any lubricant also means that they won’t function properly.
You’ll notice reduced friction between your bike parts if you don’t have enough lubrication in your parts because they won’t move as smoothly as they should.
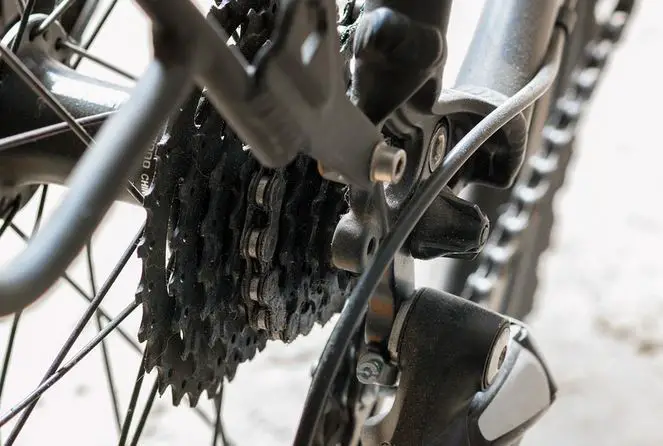
10. Worn Cassette
You may not be able to simply replace the chain if it is worn and stretched beyond repair.
Also read: SRAM xg 1195 vs 1150: Detailed Comparison
This is because the cassette cogs will have already been damaged and worn to the point where a new chain will not run properly.
How to Fix Bike Chain Slipping When Pedaling Hard
For some, the thought of dealing with a slipping bike chain is downright terrifying.
Thankfully, here are seven easy ways to fix bike chain slipping when pedaling hard that will save you time and frustration. It will no longer be an issue if the procedure is followed correctly.
1. Get Rid of Dirt Build Up in Your Pedals
To eliminate this issue, use a degreaser or solvent to thoroughly clean the affected areas.
Use an old toothbrush to remove any grime that has become entrenched between the gears of your crankset (the part of your bike where your pedals attach).
Using a rag or rag towel, add a little coating of grease (or lubricant) to the chain after removing all dirt.
Be careful NOT to over-grease, as this can hinder your ability to pedal smoothly and effectively.
2. Clean your chain
Your bike chain can slack if it’s covered in dirt or dust, which can make it difficult to pedal.
To avoid this from happening again, it’s important to use high-quality chain lube.
Use a small brush if you find it difficult to get into all the nooks and crannies of your bike chains and clear away any dirt or grime that may be causing friction.
3. Use Lubricant on Your Chain
Remove the bicycle’s chain.
With a rag and a few drops of oil, clean the chain.
Apply a tiny layer of lubricant to the chain and allow it to soak into the metal tube.
Make sure the chain is properly aligned with the sprockets and gears of your bicycle before reinstalling it (if applicable).
Recommended: WD-40 Pro-Strength Lubricant.
It comprises lubricants suited for bike chains and other metal-to-metal components, such as cables and gears in motorcycles, autos, and trucks.
It also includes rust inhibitors to protect these components from corrosion caused by moisture and dirt buildup.
4. Adjust your sprockets
In a nutshell, this is the most simple and effective solution.
Sprocket adjustments can be made by turning them either clockwise or counter-clockwise to stop the chain from slipping.
It’s advisable to do this on a bike you don’t mind getting damaged.
If you own a nice bike, make sure you have the necessary tools on hand for sprocket adjustments.
5. Check your wheel bearings
First, you must remove the wheel from your bicycle.
After removing the wheel, inspect the bearings for signs of wear and tear. A magnet and a magnetic screwdriver are the best tools to use for this purpose.
Both the magnet and the axle itself can be mounted to the vehicle.
If these parts show evidence of corrosion or rust, the bearings themselves are likely showing signs of wear and tear.
To decide which bearing has to be replaced, inspect each one for evidence of wear or damage.
If there are many issues with the bearings at the same time, it may be essential to replace more than one at a time.
6. Adjust your derailleurs
Unscrew the derailleur’s screw using your hand. You should be able to see gears within it that are compatible with your bicycle’s shifting system.
Apply a little layer of oil or lubricant to the bearings of the two derailleurs.
Ensure that it is not very thick, as this can make them slippery when riding.
Hand-rotate each derailleur and ensure that it travels easily and smoothly in all directions, with no binding or catching sounds (this could mean that something is off).
Before changing the derailleurs themselves, if necessary, adjust the cable tension and ensure the bike is properly adjusted for chain alignment.
For a more detailed guide, read this.
7. Check for Worn Chain & Cassette
The chain should be checked first. The chain mustn’t be too tight or too loose.
Pulling the bike along with some pedal pressure is a good way to evaluate this. The chain should be tightened if there is any slack.
If this doesn’t work, then it’s time to check the cassette. To keep your gears in place, the cassette lies on top of them.
It should be so tight that there are NO gaps between gears. Any gears that have gaps between them should be corrected or replaced entirely.
Tip: If you change your chain and cassette and the chain continues to skip after you have done so, you will likely need to replace either your crankset or your chainrings.

Regular cleaning and maintenance of your cycles to prevent the bike chain from slipping when pedaling hard and keeping mud and dirt out of the chain helps our cycles last longer and perform better. In addition, use a chain catcher that can also help prevent the bike chain from popping off.